This site uses cookies to improve your experience. To help us insure we adhere to various privacy regulations, please select your country/region of residence. If you do not select a country, we will assume you are from the United States. Select your Cookie Settings or view our Privacy Policy and Terms of Use.
Cookie Settings
Cookies and similar technologies are used on this website for proper function of the website, for tracking performance analytics and for marketing purposes. We and some of our third-party providers may use cookie data for various purposes. Please review the cookie settings below and choose your preference.
Used for the proper function of the website
Used for monitoring website traffic and interactions
Cookie Settings
Cookies and similar technologies are used on this website for proper function of the website, for tracking performance analytics and for marketing purposes. We and some of our third-party providers may use cookie data for various purposes. Please review the cookie settings below and choose your preference.
Strictly Necessary: Used for the proper function of the website
Performance/Analytics: Used for monitoring website traffic and interactions
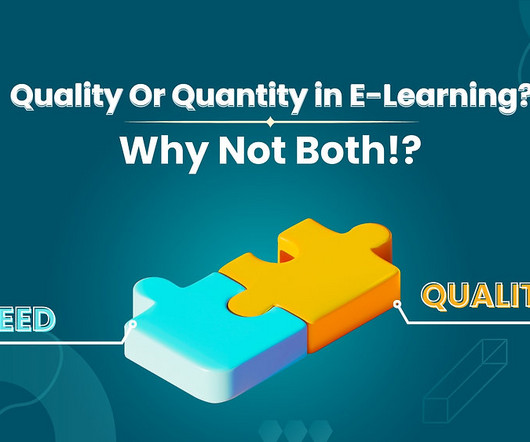
One can evaluate the cost to benefit ratio of a solution by measuring the results in terms of the time or effort saved. For an eLearning project to be executed successfully, it is not required for the team to have all the tools in their box.
For example, you could transform a webinar into a microlearning module or repurpose an elaborate training manual as an infographic or video tutorial. Aim for a 40% original and 60% curated content ratio, emphasizing high-quality and actionable resources. Content repurposing is essentially reusing your content.
Now… on with the repurposing tutorial. In the tutorial below, we’re incorporating the following concept from the interview with Margie: The science of evolution and how brain developed. Take that same ”Goldilocks” question template and email template from the microlearning tutorial. Guess what aspect ratio a video is?…
Based on the golden ratio , the golden spiral can be found in some of the most famous artworks in the world. Famed polymath Leonardo da Vinci incorporated the mathematics of this ratio into his paintings. On widescreen slides – as in, slides with a 16:9 ratio – a 12-column grid works best. We feel pleasure and we call it beauty.”
The way Self-Paced Learning is structured allows a more constant flow of information and its backed up, different from Instructor Led Training method, making of Self-Paced Learning the most flexible between them thanks to pre-recorded tutorials accessible at any time during the training. Instructor Led Training vs. Self-Paced Learning.
I get a lot of requests for software demos and quick tutorials. Here’s an example of what I do: Let’s suppose I am recording some PowerPoint tutorials. I also want the window to be 4:3 aspect ratio. So I need to figure out what the proper dimensions are for a 4:3 aspect ratio that is 1096 pixels wide. Tidbits.
This tutorial makes use of the Quick Styles gallery feature. In this tutorial you’ll use one image to create and save custom styles to the gallery. Hold the <Shift> key to maintain aspect ratio when resizing. Layered graphics are impressive to see and they are fast and easy to create using Snagit 12.
I call this balance the “glory-to-effort&# ratio, i.e. the amount of glory one is likely to receive relative to the amount of effort required to achieve said glory.). Listed below are ratings and video tutorials for 5 tools that I commonly use: 1. PowerPoint (Quality: Medium, Ease: Simple!). . GIMP (Quality: High!,
If you want to learn more about the importance of color and design, dive into our Introduction to Design tutorial). requires color contrast to meet a certain ratio based on variables, including the size and weight of the text. For simplicity’s sake, however, the minimum ratio that WCAG 2.1 requires is 4.5:1.
Here’s a detailed tutorial that walks through the process of creating similar graphics in PowerPoint. Click here to view the PowerPoint tutorial on YouTube. The links below take you to specific parts of the tutorial. The tutorial above shows how I created the images. I cover a lot of little PowerPoint tips.
Click here to view a tutorial. Here are some tutorials that demonstrate how to create various objects in PowerPoint: Create a glassy marble. Click here to view the tutorial. Click here to view the tutorial. Click here to view the tutorial. Click here to view the tutorial. Click here to view a tutorial.
And because of the responsive nature of the Rise courses, the cover image gets cropped based on the screen’s aspect ratio. View the animated.gif tutorial on Youtube. View the animated.gif tutorial on Youtube. Understanding the Cover Image.Gifs. Cover images are mostly decorative. The key is keep the cover images simple.
Over the years, I’ve posted hundreds of tutorials using PowerPoint. That and 4:3 are the most common aspect ratios. For example, the flashcard interaction in Rise is a 1:1 aspect ratio. Tutorial: how to remove backgrounds of images in PowerPoint. Some of them to be updated. Save PowerPoint Content as an Image.
Watch this tutorial to learn how to add objects to Fluid Boxes, move object to a different Fluid Box, unlock objects from the Fluid Box, maintain aspect ratio of objects inside Fluid Boxes, and resize the objects inside Fluid Boxes. Now with the screen layout ready, it’s time to add Captivate objects to these newly added Fluid Boxes.
Open the course and right click to access the developer tools (see tutorials below). Get the Aspect Ratio of Popular Devices for Responsive Courses. Even if you don’t use the responsive emulators, it’s still an easy way to get the aspect ratios and resolutions of the popular mobile devices. Internet Explorer 11 ( Why bother? ).
4 How to Maintain Aspect Ratio. You should know how to keep the aspect ratio for every object or image in your course. By setting your width and height to auto, your object will be able to maintain the right aspect ratio. Video Tutorials Playlist: Responsive eLearning with Adobe Captivate 8. . - GeoLocation. #4
His use of Snagit grew from making simple tutorial videos for his software and website to furthering customer’s YouTube marketing to generate more contractor leads. He sets the ratio setting to be optimum for an upload to YouTube and then uses Snagit to create the file and load to YouTube.
Screenr’s a great product for quick tutorials. In fact, since it launched a few months ago there are already a few hundred free elearning-related tutorials that cover all sorts of topics. Here’s a tutorial that shows how. Insert the tutorial as a web object. 720×540 is the 4:3 ratio of PowerPoint slides.
For example, if you record a screen that is bigger or smaller than the size of the video you want to create, or if your monitor doesn’t fit a standard 16:9 aspect ratio. Our instructional designers here at TechSmith often use scaling to create tutorial videos. In these situations, scaling the recording is unavoidable.
No aspect ratio concerns. In fact, there’s this handy dandy screen capture program called Snagit that uses GIF for an introductory tutorial. Then, make sure to view the Learn the How to Make an Animated GIF tutorial. Consider how the creation, distribution, and consumption of content have evolved from static. No audio hassle.
Tutorial : this tutorial walks through the template and shows a few production tips. Create template files where the slides have the same aspect ratio as the various panels. Tutorial : How to work with comic-panel#.ppt Tutorial : How to create layout mask images to use as panel covers.
Scale object: If you want to resize the image or object (and not mess up the aspect ratio), then press SHIFT and drag from the corners. You’ll see that the shape resizes, but the aspect ratio stays the same. The image above is from a tutorial I did earlier this year. Use gradient fills to create depth and visual interest.
This really helps when I need to add hyperlinks, which you can see in the tutorial below. CA Student Teacher Ratio : David Anderson created this based on a multimedia file he saw online. Below is a series of tutorials to support the information above and fill in some gaps. Click here to view tutorials.
Rick blogs on Profound Paradigms , where he creates video tutorials to explain the most efficient ways to complete various tasks. Check out our resources for aspect ratios to make sure those bars don’t come to visit. Can’t see the video? Watch it on Screencast.com ! Black bars are back to haunt!
Tutorial: how to create a three-slide video using 3D models in PowerPoint. The video I create in PowerPoint is the exact same aspect ratio as the Storyline file. But if you change the aspect ratio of your.story file make sure you do the same on the PowerPoint slide. A Teardown of the 3D Model Interactive Videos.
I’m not talking about elearning tutorials or online webinars, though these may form a part of a distance learning course. In our free Rapid eLearning Development (ReD) course we see the following approximate ratio: 100 people – enrol and are sent joining instructions. Typically takes a number of weeks, months or years to complete.
No aspect ratio concerns. There’s this handy dandy little screen capture program called Snagit that uses GIF for an introductory tutorial. Then, make sure to view the Learn the How to Make an Animated GIF tutorial. The creation, distribution, and consumption of content has moved away from static Web 1.0 No audio hassle.
As we now know, Static Fluid Boxes have to maintain their aspect ratio. In this video tutorial, I show you the new Virtual Reality Projects in Adobe Captivate 2019. In this video tutorial, I show you what I predict will be the standout feature of Adobe Captivate 2019, Interactive Video. Virtual Reality Projects.
We have a wealth of presentation inspiration for everyone, from the entry levellers dipping their toes into PowerPoint, to those with real design know-how looking to get the golden ratio involved. If you want the low-down on how hyperlinks work, then check out this video tutorial. Presentation design resources.
It’s been another great month at eLearningArt… We published a bunch of new blog posts and video tutorials. Free eLearning resource screen template and tutorial. Free eLearning tool of the month: Aspect ratio calculator. Our members enjoyed the 101st week in a row of new characters being released. 4 blog posts released.
I had to make some adjustments, while maintaining the aspect ratio to get fit the image exactly into 1024X627. There are lots of great tutorials about custom themes. To size the background image, I created a 1024X627 landscape file (72 resolution) and placed my Droplet image. In this example, I like it just the way it is.
For example, as the CFO explained the historical revenue sources, margin ratios and competitive strengths and compared those with the future business goals, his tutorial led me to ask more questions which, in turn, expanded this initial meeting to more of a mentoring relationship.
In most cases, this is “to improve framing or composition , draw a viewer’s eye to the image subject, or change the size or aspect ratio.”. To see some of these examples in action, check out our tutorial Editing in-Depth 2, which discusses the crop mode at the 2:15 mark. Display multiple clips on screen simultaneously.
In this video tutorial, we’ll show you 2 different ways to crop in a circle in Photoshop. Then it will do a circle, you’ll want to keep the aspect the ratio the same, so you’re going to hold shift, and then just drag what you want to crop. In one, you’ll enclose the entire image in a circle.
How To Fix: Take a look at some tutorials on how to add animation and effects to your graphics or text in Camtasia. How to fix: Take a look at this tutorial that shows you different ways you can “blur it out.” That will maintain your aspect ratio and give you room to maneuver your shot. Adjusting Your Frame.
It’s created in Storyline 2 and uses a 16×9 aspect ratio. Four section office exploration with tutorials. Click here to view the elearning interaction. Free E-Learning Interaction Template. Here’s a link to the free elearning interaction template. Download the interaction template. Flat office template.
Here’s a video tutorial that quickly walks through the steps outlined below. A circle has a 1:1 aspect ratio. And this is where PowerPoint comes in handy. It’s a tool most of use have, and it can do exactly what you need with minimal effort. Customize slide size.
Now… on with the repurposing tutorial. In the tutorial below, we’re incorporating the following concept from the interview with Margie: The science of evolution and how brain developed. Take that same ”Goldilocks” question template and email template from the microlearning tutorial. Guess what aspect ratio a video is?…
For instance, businesses can incorporate webinars, tutorials, and interactive guides. One critical metric is the Active Users ratio, which compares the number of active users to the total number of users. A higher ratio indicates a more successful product adoption strategy. User Retention Rate is another pivotal metric.
So, before you start designing slides, change the aspect ratio of the slides in PowerPoint to match the dimensions of the screen. (We To change aspect ratio in PowerPoint go to Design , Slide Size , Custom and then enter the correct details. This is a really tough question to answer. It depends on the scale of the screen.
Watch my video tutorial or scroll down for step-by-step instructions. You can simply print it as is, but of course there’s so much more that you can do to print PowerPoint with notes that look good and give off a sense of professionalism. How to create a PowerPoint notes master. How to add notes in PowerPoint.
Skip to content Follow: RSS Twitter LearnNuggets Nuggets of Learning Stuff Home About Resources Tags articulate , eLearning , tutorial Lesson I: Making your own Custom Articulate Player by Kevin on May 20th, 2010 To kick things off, a note on the words: “Player” and “Skin”. The average computer aspect ratio is 1024 x 768 pixels.
Overview tutorial showing the background and characters angles that I use when building a conversation in an eLearning course. I have the original image here and then what I did was size it to be a 4×3 ratio so that it would fit into a into an authoring tool like PowerPoint. Download Source Files. Video Script. I did 800×600.
In the drop down, hover over BrightSlide and you’ll get the colour contrast ratio and a handy tick or cross to tell you if the colour combo passes the Web Content Accessibility guidelines. Thankfully BrightCarbon’s BrightSlide geniuses have put together a tutorial video to walk you through the tool’s functionality. Start at about 1.10!
We organize all of the trending information in your field so you don't have to. Join 59,000+ users and stay up to date on the latest articles your peers are reading.
You know about us, now we want to get to know you!
Let's personalize your content
Let's get even more personalized
We recognize your account from another site in our network, please click 'Send Email' below to continue with verifying your account and setting a password.


Let's personalize your content