This site uses cookies to improve your experience. To help us insure we adhere to various privacy regulations, please select your country/region of residence. If you do not select a country, we will assume you are from the United States. Select your Cookie Settings or view our Privacy Policy and Terms of Use.
Cookie Settings
Cookies and similar technologies are used on this website for proper function of the website, for tracking performance analytics and for marketing purposes. We and some of our third-party providers may use cookie data for various purposes. Please review the cookie settings below and choose your preference.
Used for the proper function of the website
Used for monitoring website traffic and interactions
Cookie Settings
Cookies and similar technologies are used on this website for proper function of the website, for tracking performance analytics and for marketing purposes. We and some of our third-party providers may use cookie data for various purposes. Please review the cookie settings below and choose your preference.
Strictly Necessary: Used for the proper function of the website
Performance/Analytics: Used for monitoring website traffic and interactions
digital compass, gyroscope, audio, dual cameras, bluetooth, proximity, etc), we will actually create better learning experiences on mobile, as compared to what we have today through desktop eLearning. I recommend you hold weekly brainstorming sessions with your teams, where you start to reimagine your learning on mobile devices.
Create clear visuals with a smartphone or camera. But that doesn’t mean you need to purchase an expensive DSLR camera because most smartphones can shoot in 4K. Smartphones have a limit on storage space which is a downside to using them instead of a camera. Get crisp audio with a mic and pop filters.
Invest in audio first, then some inexpensive lighting and a green screen. For many training purposes, your camera phone will be good enough (especially on a tripod or rig). You’re better off using a mobile device camera that you can use well than in buying an expensive camera you don’t know how to use.
Mobiles devices today are extremely capable – working as a phone, camera, audio/video recorder, mp3 / video player, computer, internet device, GPS device, eBook readers, game console, bar code, QR code scanner, motion sensor and more. It captures the social context of media consumption.
Knowing what you need from an eLearning authoring tool can be hard, especially when there are so many options on the market. gomo’s new ebook aims to save you time and hassle by identifying 12 must-have authoring tool features.
e- Facebook releases new Camera app for iPhone and iPod touch. Your browser does not support the audio element. RJ Jacquez wrote about this here. d- Last Wednesday, the White House released its Digital Government Strategy : Digital Government: Building a 21st Century Platform to Better Serve the American People. Send to Kindle.
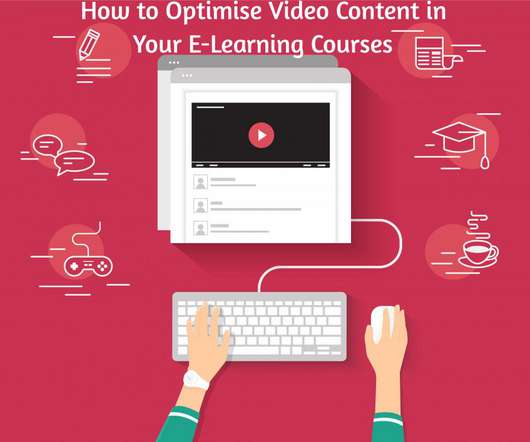
Here are some reasons to include videos in eLearning: Engagement: Videos provide greater engagement than text or images for the simple reason that it combines audio, video and text. With camera phones recording a video is a breeze and at almost no cost. Why Videos in eLearning?
Production is also very important from both an audio and visual standpoint. If you are wanting to record live video then you will want to do some research to make sure you pick a camera that is crystal clear. A decent camera will put you back a couple hundred dollars.
TechSmith's Camtasia Audiate has revolutionized how creators approach audio and video content production. With its intuitive interface and powerful features, Camtasia Audiate goes beyond traditional audio editing to provide AI tools for generating voiceover scripts, text-to-speech audio, and lip-synched avatars.
In this LMScast episode, Ken Theriot, shares his journey into audio and how he became a course creator and how to produce professional audio for courses. Ken Theriot is an audio professional and course creator. He is the owner of Home Brew Audio , a platform aimed at teaching people how to do audio recording at home.
In many raw footage films the interview or documentary is the A-roll and the B-roll is the landscape, image scrolls, or video footage that illustrates the audio of the A-roll. A common misconception is that because eLearning videos are educational, B-roll is unnecessary, and that a video clip of someone speaking on camera is enough.
There are many ways to build video tutorials, but how could an audio-first workflow optimize your process? An audio-first workflow for visual content might sound awkward, but it’s one of our preferred methods for creating tutorial videos. In this post, we’re going to walk you through our audio-first workflow. Write a script.
You can’t record video and audio at the same time. How to record your screen on Mac with audio. Step 2: Choose audio to record. With Snagit, you can easily record your Mac screen with audio included. After you have selected the region you want to record, it’s time to choose your audio record settings.
When making a clean and crisp eLearning video, you have several choices for audio styles and recording setups. For our live-action video, we have two types of visual situations with audio that runs throughout. Whenever the camera is on our actress, we used a boom microphone to record her voice. Simple for the performer.
Some prefer visual material, others written and others prefer audio or a combination of those. Today, we are so excited to announce our new and revamped Audio Player , that will take your audio upload and management to the next level! We have done a complete make-over in the way an audio learning activity is presented.
In addition to offering ways to branch and show different videos, this also gives you ways to collect video and audio responses. While I don’t like how they advertise that for asynchronous job interviewing (I think I’d find that a disconcerting process as a candidate), I can see uses for video and audio responses in learning.
We have the tools at our disposal – from the camera on our smartphones to a plethora of free editing software downloadable from the internet. The audio is crisp and clear. When we record a video on our smartphone, the picture might be somewhat dull, the audio tinny, the lighting dodgy. So why doesn’t everyone do this?
All many of us need is a dry erase board, a good camera, and a lesson plan. Remember that when film time comes, you will have to remember your script while also demonstrating a task and talking to the camera. You may decide to narrate your video later, or to use on-screen text instead of audio.
Authoring tools will often include content libraries with images, audio or video for use when building your eLearning course. When the user can interact and actively engage with media in an eLearning course, such as interactive videos , branched scenarios, text, graphics, audio, and animation. Compliance Training. Content Library.
The point is that content is prepared media, whether text, audio, or video. To be clear here, capture is where you use the text insertion, microphone, or camera to catch unique contextual data (or user input). So, we can be getting things for an individual, or it can be something that’s socially generated or socially enabled.
For example, we strip out the audio and transcribe it. Then the audio is synced up with the new slides and converted to a self-paced Thinkific course. We took the audio, and PowerPoint slides and then rebuilt the course in Articulate Storyline. Use complementary audio and video elements to convey your explanation, and.
Currently, these experiences are primarily visual, with some audio support. Similarly, augmented reality refers to a mixture of real world data with technology, such as using your smartphone’s camera and location data to play a game. To start, let’s clarify what virtual reality means in the real-world (non-science-fiction) context.
TechSmith is proud to present the ultimate gift guide for the video creator, audio editor, or remote worker in your life. If you want to level-up your video or audio production, or want to know what products the TechSmith team recommends to make truly great videos, then your Christmas has come early! Good tech isn’t just for Christmas.
Combining moving pictures with audio in a compelling way draws people into the subject. The combination of video and audio reinforces the content in several different areas of the brain – increasing the likelihood that the material will be stored in long-term memory. These two concepts seem to go hand in hand. People respond to video.
Using Camtasia, you can add callouts, images, audio, Flash hotspots, animations, and even a quiz.). During the Camtasia Recording process, it's as if a video camera was pointed at your display. . The video automatically opens in Camtasia Studio and is inserted on the Timeline.
Most webinar platforms let you send an audio link or telephone number that allows participates to comment and ask questions. This lets you capture visual and audio input for re-distribution and later use – perhaps in bonus products. You can usually mute everyone until the Q&A session if you choose.
I, on the other hand, make frequent mistakes when shooting on camera, or when recording a screencast, so I’ve put together a few tips on how to make correcting video errors using your Camtasia timeline as simple and straightforward as possible. Fix audio with ADR (over dubbing). Even in the recording studio, audio is subject to error.
It can digitize and compress an audio or video signal for transmission and convert an incoming signal to audio or video for reception. While the word “compression” can conjure images of pixelated video, the process is both necessary and efficient with modern digital cameras. Audio actually uses its own codecs.
These include video and audio conferencing, collaboration, chat, and webinars. Video and audio processing requires a very high CPU percentage. Meetings are a collaborative event with all participants able to screen share, turn on their video and audio, and see who is in attendance. All participants can mute/unmute their audio.
As soon as the camera is rolling, it’s almost guaranteed that your mind will go blank. In an online world crammed with people uploading courses and video tutorials, the way to stand out is to have better quality audio, video, and self-presentation. Let’s take that apart: Audio. Write A Script. Step 3 – Filming Your Video.
In many cases, we are downright frightened of to pick up a video camera or turn on video on our smartphones. The only hard and fast rule here is to try to be sure your audio is clear. This means whipping out your video device, be it a smartphone or actual video camera. However, we hesitate to produce video. Fear of failing ?
Mobile’ is a unique device that brings together the capabilities of numerous disparate devices – like a phone, a camera, an audio/ video player & recorder, a computer, eBook reader, a GPS device, a game console – all in the palm of your hand. Invariably, it forces you to focus on how to deliver learning on mobile devices.
Two years ago, I was at DevLearn with eLearning Brothers running the camera and audio at the eLearning Rockstars stage. I got to watch presentations from industry leaders who were talking about best practices in course design, learning management, and other awesome topics.
Similarly for performance support: with a smartphone you could take what comes through the camera and add it onto what shows on the screen; with glasses you could lay it on the visual field. With a watch or a ring, you might have an audio narration.
In context of mlearning native apps score over mobile web when your staff need to access information when in low/no connectivity areas or need to perform specific operations which need to use devices’ native capabilities like camera or higher processing capability. Apart from ‘static’ content like documents, videos, audio files etc.,
Choosing the Right Camera Selecting the appropriate camera is crucial. Whether you opt for a high-end digital cinema camera or a versatile DSLR, ensure it aligns with the visual style outlined in your storyboard. Audio Equipment Considerations Don’t overlook the importance of audio quality.
We’ve created tools that allow us to capture things accurately: cameras and microphones with audio recording. Basically, your brain fills in the rest (which leaves open the opportunity to make mistakes). What do we do? This allows us to capture the context exactly, not as our memory reconstructs it.
If you’re looking at expensive cameras and tripods, or enquiring with professional videographers, you can stop right now. Close windows to limit outside noise Ask your presenter to wear plain clothing, as patterns can be distracting on camera. Check out our support article for more on this. Get the right equipment.
Audio is key to delivering results. Make sure you have great audio. Almost 90% of the videos that submitters rated four or five stars for “how accurately did the video achieve its goal” and “how did you personally rate the video” had clear audio. to ensure your audio quality hits the mark, invest in a stand-alone mic.
This provides the possibility to viewers to decide the path they want to take and swipe between scenes or videos and switch camera views. A screencast is a digital recording of computer screen output, usually containing audio narration. Loom allows you to record your camera and screen with audio. Wirewax Screenshot.
Not only is the microphone on your camera or computer pretty low quality, it also picks up more background noise than a dedicated audio source. Check Amazon for affordable soft boxes. They’re worth the investment. Get a microphone. Add a simple video bumper.
You can set the camera rolling and then ask the trainer to contact you once they’ve finished. Bonus points if you have 2 cameras, you can film from different camera angles and splice the footage together to give your learners more variety in the final production.
If you’re looking at expensive cameras and tripods, or enquiring with professional videographers, you can stop right now. Close windows to limit outside noise Ask your presenter to wear plain clothing, as patterns can be distracting on camera. Check out our support article for more on this. Get the right equipment.
Look at the camera. Where possible, include the instructor in the video looking at the camera and talking directly to the learner. Make sure the audio and visuals work together. Make sure the audio quality is excellent. Following on from the last point, there is no substitute for good quality audio. Probably not.
We organize all of the trending information in your field so you don't have to. Join 59,000+ users and stay up to date on the latest articles your peers are reading.
You know about us, now we want to get to know you!
Let's personalize your content
Let's get even more personalized
We recognize your account from another site in our network, please click 'Send Email' below to continue with verifying your account and setting a password.


Let's personalize your content