This site uses cookies to improve your experience. To help us insure we adhere to various privacy regulations, please select your country/region of residence. If you do not select a country, we will assume you are from the United States. Select your Cookie Settings or view our Privacy Policy and Terms of Use.
Cookie Settings
Cookies and similar technologies are used on this website for proper function of the website, for tracking performance analytics and for marketing purposes. We and some of our third-party providers may use cookie data for various purposes. Please review the cookie settings below and choose your preference.
Used for the proper function of the website
Used for monitoring website traffic and interactions
Cookie Settings
Cookies and similar technologies are used on this website for proper function of the website, for tracking performance analytics and for marketing purposes. We and some of our third-party providers may use cookie data for various purposes. Please review the cookie settings below and choose your preference.
Strictly Necessary: Used for the proper function of the website
Performance/Analytics: Used for monitoring website traffic and interactions
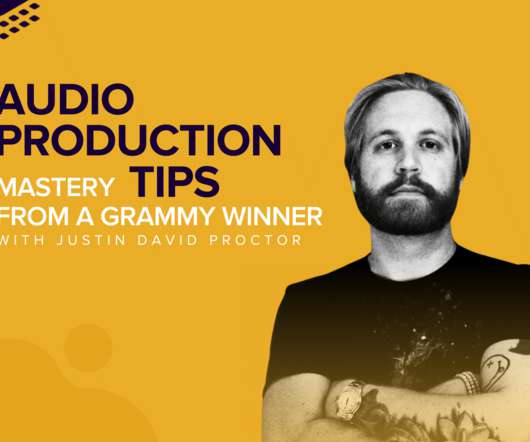
Studio microphone and pop shield on mic stand. Environment – Choose the best possible environment for recording the audio and be sure to do a sample test ahead of time. If you are designing and developing eLearning, you are most likely going to need voice-over work. Any words that are difficult to pronounce (e.g.
Lecturing to a group of people for 30+ mins, with their mics muted and no interaction, will become passe at best. And if you’re unsure how accessible your website is you can test it using free online accessibility checkers. . #2 One-Way Virtual Sessions Aren’t Enough. And they should. And for a quality learning experience.
I didn’t use a mic for anything other than our team’s presentation, and it’s easier to listen with speakers for hours a day than a headset. It’s also easier to use my headset and mic with my laptop than to dig around behind the tower to plug it in. Yes, I am that lazy. Daily Workflow. Transitions.
Test Your Connection Ahead of Time. Request to do a test of the online meeting space software with the course registrar at least a week prior to the class and then, if necessary, have your IT department look into getting you access. This will give you time to test your audio and get familiar with the training space's features.
While we couldn’t test every microphone, we brought together 18 different microphones from brands like Blue , Rode , Shure , Sennheiser , and Audio Technica to see what microphone is best for recording video. We tested them out (so you don’t have to) to see how they measure up. We tested all of our microphones in our sound studio.
Test out your equipment, microphone positioning and see how it sounds before you press record. Any preproduction you can do before the day of the session, before you hit record, any kind of planning you’re doing ahead of time, including testing technology, is going to go a long way.”. Always do a test run. Invest in quality.
In the final week of the Camtasia test drive, Loudpixel Co-Founder Allie Siarto reflected back on their month of screencasting. What are some of the lessons learned during this test drive? We already use a pro mic and Pro Tools for recording. www.loudpixel.com.
So we tested 18 different microphones from brands like Blue , Rode , Shure , Sennheiser , and Audio Technica to see which are the best microphones for recording video. We wanted to test our microphones is a fair and consistent way. Mic level was just shy of the midpoint. This XLR mic isn’t a name that will roll off the tongue.
We’ve definitely gone past the boxes-for-a-standing-desk and forgetting-to-unmute-your-mic phase of the pandemic. This past summer was the perfect opportunity to test out new. We’re a few months into shelter-in-place and it simultaneously feels like the shortest and fastest year ever.
What mic I use is the most frequent question I get. There are all sorts of good mics out there. I used to use a headset mic, but I didn’t like that it was more susceptible to picking up the “popping p” sound. So I switched to a desktop mic and haven’t looked back. I just plug the mics into my computer and record.
If you are recording with mobile devices or lower end cameras, they will most likely have very poor built-in mics that are designed to pick up a wide pattern of sound. Unless you have a higher end camera that has a built-in shotgun mic, you are going to want consider recording audio separately from your video. Lavalier microphone.
Then and, okay, so before I go off down any rabbit holes, this doesn’t have to be, this happens to be a, a good mic. A pretty good mic cuz I use pretty high quality stuff when I’m recording music and and voiceovers. But it doesn’t have to be, it just has to be close to your mic. I do that separately.
Mistake #2 – Forget to turn on your mic. It’s beyond frustrating to deliver a rousing rendition of your entire presentation only to realize that the mic has been off the whole time. Or, that the mic was on, but the volume wasn’t up enough. Only keep open programs and windows you plan to show during your video.
He’s wearing a mic so you can hear the conversation and has an earpiece to hear your suggestions. You’re still testing the same knowledge, which in learning objective land might be “Recognize common errors in TPS reports.” You’re going to coach Bob through a sales conversation with a Martian.
Most video conferencing software allows you to test your mic and camera beforehand. If you’re presenting make sure your mic is on and if not, mute yourself while you’re in the meeting’s waiting room. Once again, test your camera beforehand and adjust the lighting accordingly. So, no excuses! 2) State your name. .
USB mics are much better than the mic built-in to your machine, and they’re affordable. Shotgun mics work well when you can stay still. These work well on a boom mic. Headset mics are a solid choice, and wireless lapels work well, too. Headset mics are a solid choice, and wireless lapels work well, too.
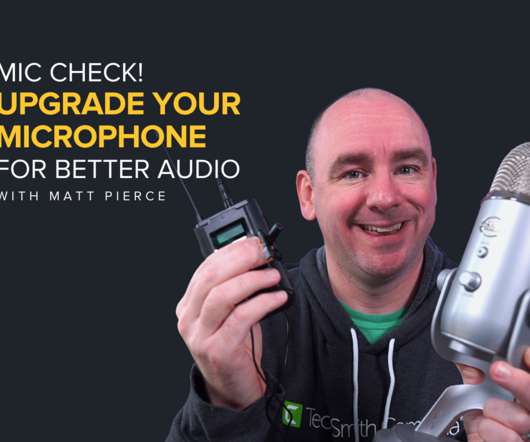
Host Matt Pierce shares some helpful need-to-know tips and even tests some of the most popular microphones on the market. Shopping for your mic. Don’t worry too much about what mic it is. But you can just as easily pick up a mic that’s cheaper. USB versus XRL mics. Are you talking into your mic correctly?
Mistake #2 – Forget to turn on your mic. It’s beyond frustrating to deliver a rousing rendition of your entire presentation only to realize that the mic has been off the whole time. Or, that the mic was on, but the volume wasn’t up enough. Only keep open programs and windows you plan to show during your video.
However, the challenge with the Blue Yeti is that I work from a home office and if people outside my office are yacking, then the mic picks up their chatter. For webinars I prefer to use a headset mic because they seem to do a better job blocking out background noise. I’ve used a Plantronics mic for years.
He can either use the computer’s mic or speakers (VoIP). The presenter can track how effective the webinar has been by the way of test materials like quizzes and polls. The presenter can choose the audio mode for the webinar. Tracking & Reporting Results.
He takes his laptop and mic out to his driveway, shuts himself in the car and records. I won’t go too in-depth with this, but my colleague Matt Pierce did an amazing post on choosing a good mic. While built-in mics are fine for Skype meetings and the like, you will get much better results with even a low-cost external microphone.
They were still trying to digest the brilliance of Julian, who should have just dropped the mic when he was done. Rather, we must seek to establish “value networks” across the professional spectrum so we can test, apply and share our new knowledge. . The dude is wicked smart!
Now that you’ve found your recording space, test out the acoustics. There are multiple types of microphones that serve different purposes, therefore it’s important to investigate which mic is going to most suitable for the kind of video you are recording. You may not be with happy how it’s sounding as it bounces off the walls.
They were still trying to digest the brilliance of Julian, who should have just dropped the mic when he was done. Rather, we must seek to establish “value networks” across the professional spectrum so we can test, apply and share our new knowledge. . The dude is wicked smart!
Including all these elements is a field-tested way to do that. to ensure your audio quality hits the mark, invest in a stand-alone mic. Even a cheap standalone mic will likely outperform a built-in one. This list isn’t about making sure you include one (or all) of these elements to make your video better.
You can record any part of the screen’s activities,plus use a mic for voice-overs (narration). Classmarker – For Corporate and Academia - online quiz maker that marks your tests and quizzes for you. Output video compressor and audio formt output included. Quiz, Assessment Creation Software. equizzer – Hosted.
Just jump in and start testing! They used a condenser mic with a Zoom H4N field recorder to capture the audio. Seeing what other software can do, you get ideas and can expand what you can do. Lynda.com is particularly helpful. People are afraid of hearing their voice and being in front of the camera.
If you find there’s a low background hiss on your test recording try reducing the gain on the microphone a little. Extend your hand fully and the distance between your thumb to your pinky finger is about the optimum distance you should be positioned from the mic. Run a few test recordings to ensure you’re happy with the setup.
Be sure to test your audio and video before recording. There is nothing worse than being midway in your recording, only to realize you selected the wrong mic, or your camera was turned off. We have narrowed it down to these 5 best practices for online video recordings. You cannot prepare enough.
You can get lapel mics for your iPhone, though, so even audio isn’t a problem with a $300 or so investment. Lapel or boom mic for quality audio. Don’t say “Nurses need to review the tests first” unless it’s necessary to define nurses. A quality camera or even your iPhone can provide quality video.
In my test, I used “neverendingstory” Once I clicked my title, the layout screen opens right up with the course, enabling you to jump right in and start editing. Sound – from file, record mic (built into the system, of course you need a headset with a mic or a mic itself). Import PowerPoint.
PT: What's Cooking in Training's Test Kitchen? Wondering what the Innovations in Training Test Kitchen is all about? Phylise will discuss the Test Kitchen approach and explain how you can integrate this approach into your own workplace to explore, share, pilot and build a business case for learning technology.
He’s wearing a mic so you can hear the conversation and has an earpiece to hear your suggestions. You’re still testing the same knowledge, which in learning objective land might be “Recognize common errors in TPS reports.” You’re going to coach Bob through a sales conversation with a Martian.
For example, they may say, “Oh, my voice is booming; I don’t need a mic.” But, they will most certainly need a mic for recording purposes. Set-up – The team should set up and test equipment early morning of Day One. Granted, your speakers are professionals, so they’re used to engaging a roomful of attendees. Communicate.
Test the internet speeds of your host, co-hosts, and panelists to ensure the best experience possible. Encourage your panelists or presenters to test their internet speeds and confirm that they have a minimum of 50 Mbps download speeds and at least 5 Mbps upload speeds. Review all webinar settings and Zoom account settings.
Ideally, you should use an external microphone to record your audio, but if you’re using an external webcam , they might already have a great microphone built-in, test it out. Mistake #2 – Forget to turn on your mic. Or, that the mic was on, but the volume wasn’t up enough. We’ve all done this at some point.
We're turning the corner to the second week of the Camtasia Small Business Test Drive ! For more formal training videos, I might put 45 minutes to an hour or more into a polished three minute video (including setting up my mic and editing the audio in Pro Tools). If you missed out on the first week, catch up here.
If something isn’t working properly on someone’s LMS, the first order of business is to test it on SCORM Cloud as this will help you identify whether it’s environmental (the user’s environment), or the SCORM file. Position the mic accordingly – Use the Cindy Crawford mole position as a job aid.
Then, go to General App Information App icon Upload the app icon, which we created Copyright Provide copyright information App Review Information is the section where you can provide information that the app reviewer can use to test your app before approving/rejecting it. If you want to release the app on a particular date, mention it here.
Mistake #2 – Forget to turn on your mic. It’s beyond frustrating to deliver a rousing rendition of your entire presentation only to realize that the mic has been off the whole time. Or, that the mic was on, but the volume wasn’t up enough. Only keep open programs and windows you plan to show during your video.
Its all about choices, and not just the obvious ones like defining learning objectives or creating tests. Is it professionally scripted and narrated or did someone just wing it with a laptop mic? Before uttering a single word, Moses had communicated the value and gravity of the lesson through design.
There are pros and cons to each of these options, and the best way to decide which to use is to do test recordings in advance to compare the video and audio quality. Again, doing test shots ahead of the official recording can be a great way of making sure you’re getting the best out of your kit.
Besides, these are quick to implement – you can simply download it from a vendor’s site, upload it on your own online training platform , run a test and launch. Optimize the quality of this learning exercise by investing in high-quality equipment such as a lapel mic, multiple cameras, and so on. eLearning Modules .
You can judge their plants in multiple categories, such as height, healthiness, or beauty and even set up trivia quizzes to test their plant knowledge. Virtual Employee Engagement Activity #8 – Open Mics. You can address this by having “open mic” sessions virtually. Some good contenders are potatoes, avocados, or lilies.
We organize all of the trending information in your field so you don't have to. Join 59,000+ users and stay up to date on the latest articles your peers are reading.
You know about us, now we want to get to know you!
Let's personalize your content
Let's get even more personalized
We recognize your account from another site in our network, please click 'Send Email' below to continue with verifying your account and setting a password.


Let's personalize your content